Fix Scratches on Dining Table: Easy DIY Tips
Discovering scratches on your dining room table can be disheartening, especially if it's a cherished piece of furniture. But before you consider replacing it, know that many scratches can be effectively repaired. This guide will walk you through simple, yet effective methods to fix scratches on your dining room table, ensuring it regains its former glory.
Before we dive into the solutions, remember that the ideal approach depends on the type of table you have. Is it wooden, glass, or laminate? Each material requires a different technique. Also, the severity of the scratch matters. Deep gouges may require professional help or may not be entirely erasable. Let's explore the best methods for each scenario.
Repairing Scratches on Wooden Tables
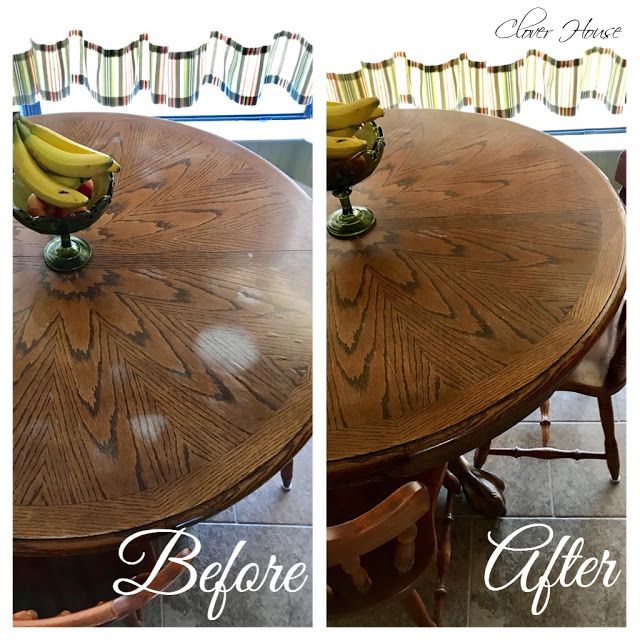
Wooden tables are classic and timeless, but they're also prone to scratches. Here are two common methods to repair them.


Touch-Up Sticks and Markers
For shallow scratches, touch-up sticks or markers can work wonders. They're available in various wood tones and can be found at most hardware stores. Simply color the scratch with the marker, let it dry, then gently buff it with a soft cloth. Repeat if necessary until the scratch blends seamlessly with the table's surface.
To ensure the best result, start with a light touch. You can always add more color, but you can't take it away. Also, choose a marker that matches the table's wood tone as closely as possible. If you're unsure, test the marker on a hidden part of the table first.


Wood Filler and Stain
For deeper scratches, you might need to use wood filler. Start by cleaning the scratch to remove any dirt or debris. Apply the wood filler with a putty knife, ensuring it's slightly above the table's surface. Let it dry, then sand it smooth using fine-grit sandpaper. Wipe off the dust, then stain the area to match the table's color.
This method requires more time and effort than using touch-up sticks, but it's more effective for deeper scratches. Again, test the stain on a hidden part before applying it to the entire scratch.
Fixing Scratches on Glass Tables
Glass tables are elegant and modern, but they're also susceptible to scratches. Here's how you can repair them.


Glass Scratch Remover
For minor scratches, use a glass scratch remover. These products contain abrasives that gently buff out the scratch without damaging the glass. Apply the remover to a soft cloth, then rub the scratch in a circular motion. Wipe off the residue and buff the area with a clean, dry cloth.
If the scratch is still visible, repeat the process. Be patient; it may take several attempts to completely remove the scratch. Always follow the product's instructions and test it on a small, hidden area first.
Glass Etching Creme
For deeper scratches, you might need to use glass etching creme. This product etches the glass, making the scratch less noticeable. Apply the creme to the scratch, let it sit for the recommended time (usually a few minutes), then wipe it off. Buff the area with a soft cloth.




This method doesn't completely remove the scratch, but it makes it less visible by creating a frosted effect. It's a good option if the scratch is too deep for a scratch remover, but remember, it will change the table's appearance slightly.
Restoring Laminate Tables
Laminate tables are durable and easy to maintain, but they can still get scratched. Here's how to fix them.
Touch-Up Markers
For shallow scratches, touch-up markers designed for laminate can work well. These markers are available in various colors and can be found at hardware stores. Simply color the scratch with the marker, let it dry, then gently buff it with a soft cloth. Repeat if necessary until the scratch blends with the table's surface.
As with wooden tables, start with a light touch and choose a marker that matches the table's color as closely as possible. Test the marker on a hidden part of the table first.
Laminate Repair Kit
For deeper scratches, you might need a laminate repair kit. These kits typically contain a filler that matches the table's color. Start by cleaning the scratch, then apply the filler according to the kit's instructions. Let it dry, then sand it smooth using fine-grit sandpaper. Wipe off the dust and buff the area with a clean, dry cloth.
This method requires more time and effort than using touch-up markers, but it's more effective for deeper scratches. Always follow the kit's instructions and test the filler on a small, hidden area first.
Remember, prevention is always better than cure. Use coasters for glasses and hot dishes, and avoid dragging heavy objects across the table. With proper care, your dining room table can retain its beauty for years to come.
Related Articles

How to Remove Scratches from Dining Room Table
Scratches on your dining room table can detract from its overall appeal and make it look less inviting. Fortunately, there are several methods you can employ...

Wood Dining Room Table & Chairs Set of 6
Transform your dining space into a warm, inviting haven with a set of six wood dining room chairs. A well-crafted chair set not only provides comfort and...

Shiplap Dining Room Table Ideas
Transform your dining room into a rustic haven with the timeless charm of a shiplap dining room table. This classic design element, popularized by HGTV's Fixer...

Dress Your Dining Room Table for Downtime
When your dining room table isn't in use, it's essential to keep it well-maintained and protected. Not only does this ensure its longevity, but it also adds to...

Banish Flies: 5 Easy Steps to Keep Your Dining Table Fly-Free
Flies buzzing around your dining table can be a nuisance, especially during meals. They not only disrupt your dining experience but also pose health risks. But...

How to Remove Scratches from a Dresser: Easy DIY Tips
Is your once-pristine dresser now marred by unsightly scratches? Don't despair, as these imperfections can be effectively minimized or even eliminated with the...