Transform Bathroom Walls: A Step-by-Step Guide to Painting Ceramic Tiles
Transforming your bathroom into a vibrant, personalized space can be a rewarding DIY project. One way to achieve this is by painting ceramic tile on your bathroom walls. This process allows you to add color, pattern, and texture to your bathroom, making it a unique reflection of your style. In this guide, we'll walk you through the steps of painting ceramic tile, from preparation to completion, ensuring a professional and long-lasting result.
Before you begin, it's crucial to understand that painting ceramic tile is a permanent decision. Unlike wallpaper or paint, you can't easily reverse the process. Therefore, choose your design and color scheme carefully. This guide assumes you're working with glazed ceramic tiles, as unglazed tiles may require additional preparation steps.
Preparation and Gathering Materials
Preparing your workspace and gathering the right materials are key to a successful project. Here's what you'll need:


- High-quality acrylic latex paint
- Primer
- Paintbrushes (for edges and details)
- Paint roller and covers
- Safety gear (gloves, goggles, mask)
- Drop cloths
- Sandpaper (120-grit)
- Tack cloth or damp cloth
- Painter's tape
- Cleaning supplies (tough grease remover, trisodium phosphate, or TSP)


Cleaning the Tiles
Start by thoroughly cleaning your tiles to ensure the paint adheres properly. Use a tough grease remover or a solution of TSP to remove any dirt, soap scum, or grease. Rinse thoroughly and allow the tiles to dry completely.
Once dry, lightly sand the tiles using 120-grit sandpaper. This helps the primer and paint adhere better. Wipe the tiles with a tack cloth or damp cloth to remove any dust.
Priming the Tiles
Priming is a critical step in painting ceramic tile. It seals the surface, promotes better paint adhesion, and helps achieve a more even finish. Use a primer specifically designed for ceramic tile and apply it using a paintbrush or roller. Ensure you cover the entire surface, including edges and grout lines.


Allow the primer to dry according to the manufacturer's instructions. This usually takes several hours, but it's essential to let it dry completely before painting.
Painting the Tiles
Now that your tiles are primed and ready, it's time to apply the paint. Choose a high-quality acrylic latex paint designed for ceramic tile. These paints are durable, stain-resistant, and designed to adhere to glossy surfaces.
Before you begin painting, lay down drop cloths to protect your floor and apply painter's tape to any areas you don't want to paint, such as light switches or fixtures.


Painting the Edges
Start by painting the edges of the tiles using a paintbrush. This technique, called cutting in, helps create a clean, professional look. Apply a thin layer of paint, working in small sections at a time. Be careful not to get paint on the surrounding tiles or walls.
Allow the paint to dry according to the manufacturer's instructions. If necessary, apply a second coat to achieve your desired level of coverage.
Painting the Main Surface
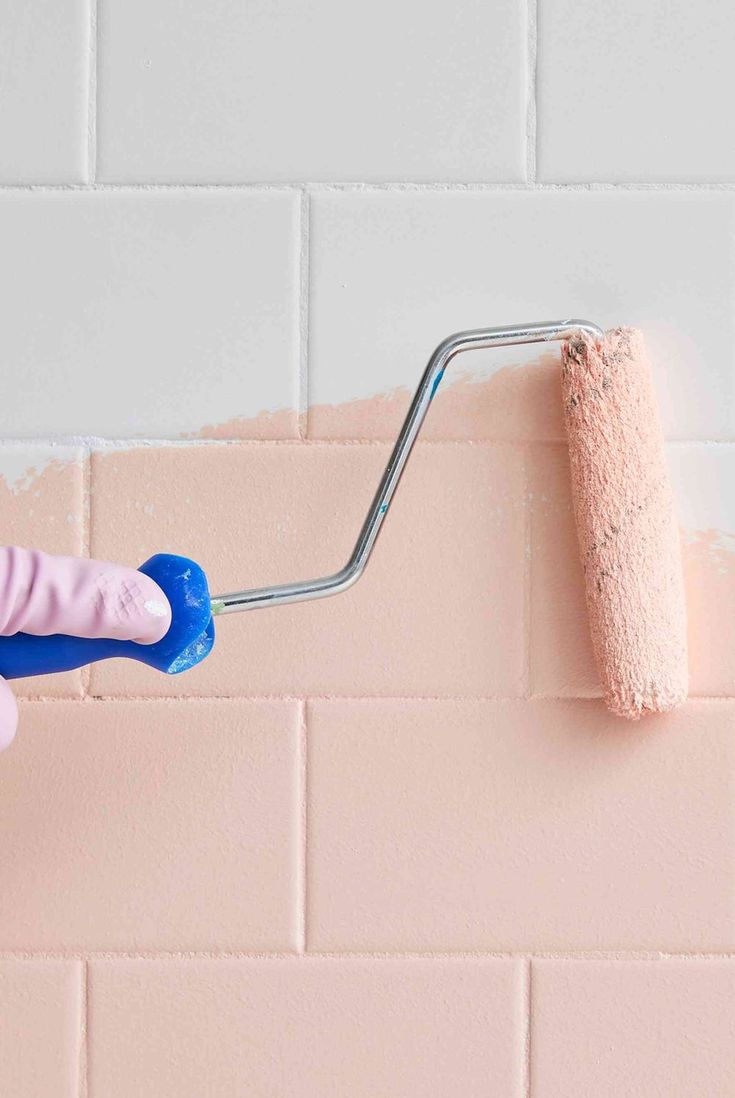
Once the edges are dry, you can begin painting the main surface of the tiles. Use a paint roller with a short nap cover to apply the paint evenly. Work in small sections, maintaining a "wet edge" to prevent lap marks.
Apply a thin layer of paint, working in a 'W' or 'M' pattern to ensure even coverage. Allow the paint to dry, then apply a second coat if needed. Always follow the manufacturer's instructions for drying times and additional coats.
Caring for Your Painted Tiles
Congratulations, your bathroom now has a fresh, new look! To ensure your painted tiles last, follow these care tips:
- Clean your tiles gently using a soft cloth or sponge and mild detergent.
- Avoid using abrasive cleaners or scrub pads, as they can scratch the paint.
- Wipe up spills promptly to prevent staining.
- Repaint any damaged areas as soon as possible to maintain the protective layer.
Enjoy your newly painted bathroom! Remember, the key to a successful project is patience and attention to detail. Don't rush through the steps, and always allow adequate drying time between coats. With a little effort, you can transform your bathroom into a space you truly love.
Related Articles

Transform Your Bedroom: Step-by-Step Guide to Painting a Mural
Transforming a bedroom into a vibrant, personalized space is an exciting project, and painting a mural is an excellent way to achieve this. A bedroom mural can...

Transform Gold Jewelry to Silver: A Step-by-Step Guide
Transforming gold jewelry into silver can be a rewarding DIY project, adding a fresh touch to your accessories. While it's not possible to physically change...

Mastering Shiplap: A Step-by-Step Guide to Painting
Transforming your space with the rustic charm of shiplap is a popular trend that's here to stay. Painting shiplap can add a touch of elegance and warmth to...

Mastering Shower Floor Tile Coverage: A Step-by-Step Guide
Tackling a bathroom renovation project? One of the most crucial aspects is ensuring your shower floor tiles are not only visually appealing but also safe and...

Mastering Tall Staircase Walls: A Comprehensive Painting Guide
Transforming tall staircase walls into a canvas of color and creativity can be a daunting task, but with the right techniques and a bit of planning, you can...

Revitalize Your Yard: A Step-by-Step Guide to Painting Cement Lawn Ornaments
Transforming your outdoor space with vibrant and eye-catching cement lawn ornaments is a rewarding task that can enhance your home's curb appeal. However, over...