Easy Upcycle Projects: Turn Trash into Treasure
In today's eco-conscious world, reducing waste and giving old items new life has become increasingly popular. Upcycling, the process of transforming waste materials or unwanted products into something useful and often beautiful, is not only environmentally friendly but also a fun and creative way to save money and express your personal style. Whether you're a seasoned DIY enthusiast or a beginner looking to make your first upcycling project, there are countless easy and rewarding ideas to explore. Let's dive into some inspiring and accessible upcycle projects that you can tackle today.
Before we delve into specific projects, let's discuss some key benefits of upcycling. First and foremost, upcycling helps reduce waste by giving old items a new purpose, keeping them out of landfills. Additionally, upcycling allows you to customize your space with unique, one-of-a-kind pieces that reflect your personality. It's also an excellent way to save money, as upcycling often involves using materials you already have or can find for free or at a low cost.
Upcycling Furniture
Furniture is an excellent starting point for upcycling projects, as there are countless ways to transform old or tired pieces into stylish and functional additions to your home. With a little creativity and some basic tools, you can give new life to everything from chairs and tables to cabinets and dressers.


Before you begin any furniture upcycling project, it's essential to assess the condition of the piece and determine what kind of transformation it needs. Consider the item's structure, any damage, and the overall aesthetic you want to achieve. Once you have a plan, gather your materials and tools, and get ready to create something amazing.
Paint and Distress for a Shabby Chic Look
One of the easiest and most impactful ways to upcycle furniture is by painting it and distressing the finish to create a shabby chic or vintage look. This technique works well with various furniture types, such as dressers, tables, and chairs. To achieve this look, start by sanding the piece lightly to help the paint adhere better. Next, apply a base coat of paint in your desired color. Once the base coat is dry, use a combination of sandpaper, steel wool, or a damp cloth to gently distress the edges and surfaces, revealing the underlying wood or previous paint layers. Finally, seal the piece with a protective finish like polyurethane or wax to ensure durability.


For a unique touch, consider using chalk paint, which requires little to no sanding or priming and dries quickly. Chalk paint also allows for easy distressing and can be sealed with wax for a soft, matte finish. Don't be afraid to experiment with different colors and techniques to create a piece that truly reflects your style.
Add New Hardware for an Instant Update
Sometimes, all a piece of furniture needs is a fresh look to feel new again. Replacing old or worn-out hardware, such as knobs, pulls, and hinges, can significantly improve the appearance of a furniture piece. Choose hardware that complements the overall aesthetic you want to achieve, whether it's modern, rustic, or industrial. For an even more personalized touch, consider making your own hardware using materials like wood, metal, or resin.
When selecting new hardware, pay attention to the size and type of screws required to ensure a proper fit. Measure the existing hardware to determine the correct size, and consider the style and finish of the new pieces to ensure they complement the overall look of the furniture piece. With a little patience and the right hardware, you can transform an ordinary piece of furniture into a stunning addition to your home.


Upcycling Home Decor
Beyond furniture, there are countless ways to upcycle household items and create beautiful, unique decor pieces. From repurposing old jars and bottles to transforming tired textiles, the possibilities are endless. By incorporating upcycled decor into your space, you can add personal touches and create a truly one-of-a-kind atmosphere.
When it comes to upcycling home decor, let your imagination run wild. Consider the materials you have on hand, the aesthetic you want to achieve, and the functionality of the finished piece. With a little creativity and some basic crafting skills, you can transform everyday items into stunning decor that reflects your personal style.
Create Vases and Planters from Repurposed Containers
One of the easiest and most versatile upcycling projects is transforming old jars, bottles, and containers into vases and planters. This project requires minimal effort and can be customized to fit any decor style. To get started, choose containers with interesting shapes, colors, or patterns. Clean the containers thoroughly, and if desired, remove any labels or adhesive residue. For a cohesive look, you can paint the containers a solid color or distress the paint for a shabby chic effect. Once the containers are dry, fill them with soil and plants, or use them to hold flowers cut from your garden.


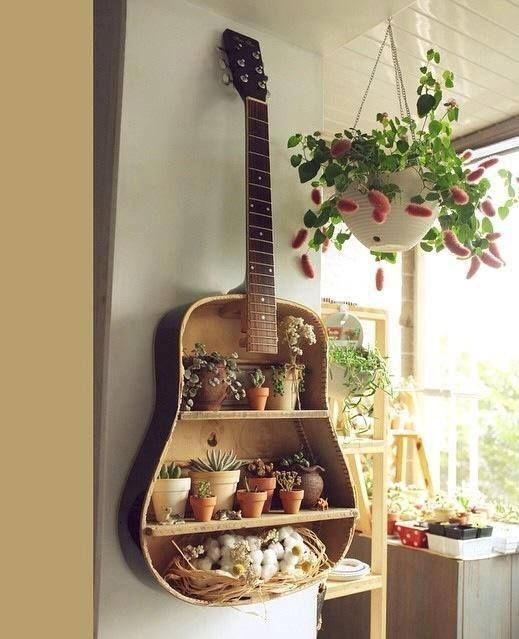


For a more permanent solution, consider sealing the containers with a waterproof sealant, such as Mod Podge or a spray sealant designed for outdoor use. This will help prevent moisture from damaging the container and ensure that your upcycled planters last for years to come. Additionally, you can add drainage holes to the bottom of the containers to create well-draining planters perfect for indoor or outdoor use.
Transform Textiles into Beautiful Wall Hangings
Another fantastic way to upcycle household items is by transforming old textiles into stunning wall hangings. This project is perfect for repurposing tired blankets, curtains, and fabric scraps, giving them new life as decorative accents. To create a textile wall hanging, start by selecting a fabric or combination of fabrics that you love. Consider the colors, patterns, and textures, and choose a design that complements your space.
Once you've selected your fabrics, cut them into strips or shapes, and arrange them on a backing material, such as a canvas or wooden board. Secure the fabric pieces in place using hot glue, staples, or stitching, depending on the desired look and durability. Add any embellishments, such as beads, tassels, or embroidery, to create a unique and personalized design. Finally, attach a hanging mechanism, such as a rod or cord, to the back of the wall hanging, and display it proudly in your home.
As you embark on your upcycling journey, remember that the key to successful projects is creativity, patience, and a willingness to experiment. Don't be afraid to try new techniques, combine materials, or adapt ideas to suit your unique style. By embracing the upcycling mindset, you'll not only create a more sustainable and personalized living space but also discover the joy and satisfaction that comes from giving old items new life. Happy upcycling!
Related Articles

Cute Upcycling Projects: Transform Trash into Treasure
In the quest for sustainability and creativity, upcycling has emerged as a popular and rewarding hobby. By transforming old or unwanted items into something...

Transform Old Ladder into Stylish Shelf: Easy DIY Tutorial
Transforming an old ladder into a stylish and functional shelf is a creative and eco-friendly DIY project that can add a unique touch to your home. Not only...

10 Creative Upcycled Products: Turning Trash into Treasure
In the quest for sustainability, upcycling has emerged as a creative and eco-friendly solution. It's a process that transforms waste materials or unwanted...

Recycled Cans Art: Transforming Trash into Treasure
In the realm of eco-friendly art, one captivating medium that's gaining traction is recycled cans. This innovative art form not only transforms ordinary waste...

Turn Jeans into Bags: Easy DIY Recycling Tutorial
Ever wondered what to do with your old, worn-out jeans? Instead of adding them to the landfill, why not transform them into a stylish and eco-friendly bag?...

Unique Upcycling Ideas: Transform Trash into Treasure
In the ever-evolving landscape of sustainability, one concept has emerged as a beacon of creativity and resourcefulness: unique upcycling. This innovative...