Diy Tool Box Organizer Ideas
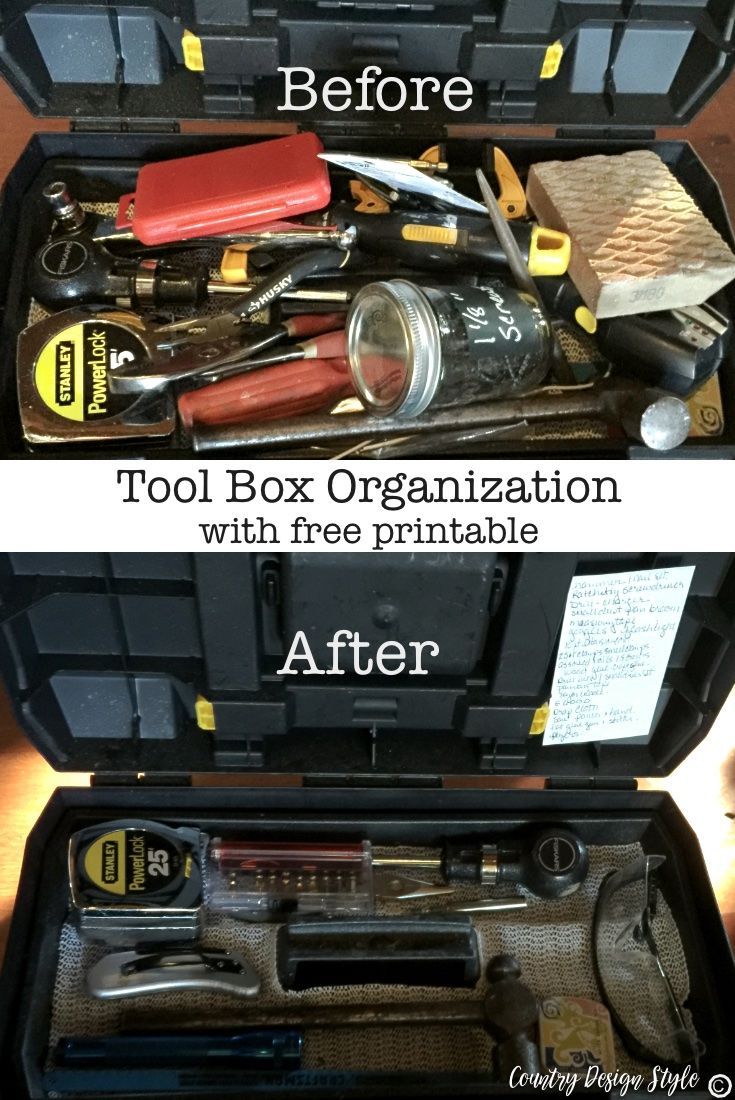
Tired of rummaging through a cluttered toolbox, only to find your screwdriver hidden beneath a pile of nails? It's time to take control and organize your tools with these DIY tool box organizer ideas. Not only will these solutions save you time and frustration, but they'll also keep your tools in prime condition. Let's dive into some creative and practical ideas to transform your toolbox into a well-oiled machine.
Before we begin, remember that the best tool box organizer ideas cater to your specific needs. Consider the types of tools you use most frequently, their sizes, and the space you have available. With that in mind, let's explore some fantastic DIY solutions to help you achieve a perfectly organized toolbox.
Utilizing Dividers and Inserts
One of the most straightforward DIY tool box organizer ideas involves using dividers and inserts to separate your tools. This method keeps your tools visible and easily accessible, making it a breeze to find exactly what you need.


You can create custom dividers using foam board, cardboard, or even leftover wood. Measure and cut the material to fit snugly within your toolbox, then use a utility knife or jigsaw to create slots for your tools. For a more finished look, consider using a hot glue gun or contact cement to attach fabric or foam to the dividers.
Adjustable Dividers
If you have a variety of tool sizes, adjustable dividers can be a lifesaver. These dividers can be adjusted to fit different tool widths, providing a custom fit for your entire collection. You can make your own adjustable dividers using PVC pipe or aluminum channels, complete with screws or bolts to secure them in place.


To create adjustable dividers using PVC pipe, cut the pipe into sections that fit your toolbox's width. Drill holes along the length of the pipe, then insert screws or bolts to secure the dividers in place. You can adjust the spacing between dividers by moving the screws or bolts to accommodate different tool sizes.
Pre-made Divider Inserts
For a quick and easy solution, consider using pre-made divider inserts designed specifically for toolboxes. These inserts often come in sets that include multiple sizes and configurations, allowing you to customize your toolbox layout with ease.
Some popular options include plastic and metal divider inserts, as well as those made from durable, eco-friendly materials like bamboo. When choosing pre-made inserts, be sure to measure your toolbox to ensure a proper fit, and consider the types of tools you'll be organizing to find the best fit for your needs.


DIY Tool Caddy and Holder Ideas
Another fantastic way to organize your tools is by creating custom caddies and holders that can be easily removed and replaced within your toolbox. These DIY solutions allow you to keep your tools organized and accessible, while also making it simple to transport your tools to and from job sites.
You can create tool caddies and holders using a variety of materials, including wood, plastic, and metal. Consider the types of tools you'll be organizing when choosing your material, and don't be afraid to get creative with your design!
Wooden Tool Caddy
For a classic and durable tool caddy, consider building one from wood. You can use a jigsaw or router to create custom slots and compartments for your tools, ensuring a perfect fit for each one. To add a personal touch, stain or paint your wooden caddy in your favorite color or pattern.


When designing your wooden tool caddy, be sure to include handles or a carrying strap for easy transportation. You can also add dividers or compartments to keep smaller tools and fasteners organized and easily accessible.
Plastic Tool Holder
If you're looking for a lightweight and durable tool holder, consider creating one from plastic. You can use a heat gun or plastic welder to mold plastic sheets into the desired shape, or purchase pre-made plastic bins and customize them to fit your toolbox.
To create a custom plastic tool holder, measure and cut plastic sheets to fit your toolbox dimensions. Use a heat gun or plastic welder to mold the plastic into the desired shape, then secure the holder in place using screws or bolts. You can also add dividers or compartments to keep your tools organized and easily accessible.
Metal Tool Holder
For a heavy-duty tool holder that can withstand the toughest job sites, consider building one from metal. You can use a plasma cutter or metal fabrication tools to create custom slots and compartments for your tools, ensuring a perfect fit for each one.
When designing your metal tool holder, be sure to include handles or a carrying strap for easy transportation. You can also add dividers or compartments to keep smaller tools and fasteners organized and easily accessible. For added durability, consider powder coating or painting your metal tool holder to protect it from the elements.
Maximizing Vertical Space with Wall-Mounted Organizers
If you're struggling with limited space in your toolbox, consider maximizing your vertical space with wall-mounted organizers. These solutions allow you to keep your tools organized and easily accessible, while also freeing up valuable workspace in your toolbox.
You can create wall-mounted organizers using a variety of materials, including wood, plastic, and metal. Consider the types of tools you'll be organizing when choosing your material, and don't be afraid to get creative with your design!
Wooden Wall-Mounted Organizer
For a classic and durable wall-mounted organizer, consider building one from wood. You can use a jigsaw or router to create custom slots and compartments for your tools, ensuring a perfect fit for each one. To add a personal touch, stain or paint your wooden organizer in your favorite color or pattern.
When designing your wooden wall-mounted organizer, be sure to include a sturdy backplate and mounting hardware for secure installation. You can also add dividers or compartments to keep smaller tools and fasteners organized and easily accessible. Consider adding a pegboard or slat wall system to further customize your organizer and accommodate a variety of tool shapes and sizes.
Plastic Wall-Mounted Organizer
If you're looking for a lightweight and durable wall-mounted organizer, consider creating one from plastic. You can use a heat gun or plastic welder to mold plastic sheets into the desired shape, or purchase pre-made plastic bins and customize them to fit your wall space.
To create a custom plastic wall-mounted organizer, measure and cut plastic sheets to fit your desired dimensions. Use a heat gun or plastic welder to mold the plastic into the desired shape, then secure the organizer to the wall using screws or bolts. You can also add dividers or compartments to keep your tools organized and easily accessible. Consider adding a pegboard or slat wall system to further customize your organizer and accommodate a variety of tool shapes and sizes.
Metal Wall-Mounted Organizer
For a heavy-duty wall-mounted organizer that can withstand the toughest job sites, consider building one from metal. You can use a plasma cutter or metal fabrication tools to create custom slots and compartments for your tools, ensuring a perfect fit for each one.
When designing your metal wall-mounted organizer, be sure to include a sturdy backplate and mounting hardware for secure installation. You can also add dividers or compartments to keep smaller tools and fasteners organized and easily accessible. For added durability, consider powder coating or painting your metal organizer to protect it from the elements. Consider adding a pegboard or slat wall system to further customize your organizer and accommodate a variety of tool shapes and sizes.
With these fantastic DIY tool box organizer ideas, you're well on your way to creating a perfectly organized workspace. So grab your tools and get started – your tools (and your sanity) will thank you! Happy organizing!
Related Articles

Garage Garden Tool Organizer Ideas
Transform your cluttered garage into a well-organized, functional space with these innovative garage garden tool organizer ideas. By implementing these...

Maximize Space: 20 Clever Closet Wire Shelf Organizer Ideas
Transforming your closet from a cluttered space into an organized oasis can be a daunting task, but with the right tools and strategies, it's absolutely...

King's Ultimate Garage Garden Tool Organizer
Tired of rummaging through a cluttered garage in search of your gardening tools? It's time to reclaim your space and boost your efficiency with the King Garage...

Maximize Space: 20 Clever Clothes Storage Organizer Ideas
Keeping your wardrobe organized can be a daunting task, but with the right strategies and tools, it can become a breeze. A well-organized closet not only saves...

How to Make a Garden Tool Organizer
Transform your garden into a well-organized, efficient workspace with a DIY garden tool organizer. Not only does a neat and tidy garden enhance your home's...

Truck Bed Organizer Ideas: Maximize Your Space
Keeping your truck bed organized is no small feat, especially if you're using it for work, camping, or hauling gear. A well-organized truck bed not only makes...